Often enough you may find yourself with a project that comprises 2 parts. A front-end application most likely an SPA built with Angular, React or any other front-end framework and a back-end that mostly serves as the endpoint for the project. Both projects hosted on 2 separate git repositories.
At first it may seem like a good idea but with time the 2 projects will grow in complexity and it will become hard to keep up with changes in both repositories. Managing dependencies becomes tricky and it’s hard to see how changing one part affects the other. It becomes easy to forget other projects you are not directly involved with and as the team loses members domain knowledge dwindles.
Monorepos are single repositories that contain multiple distinct projects. These projects may or may not be related to each other but for those related the relationship is defined in the configurations. Think of a project with Angular as the front-end and NestJs as the back-end. When both projects are under the same repository then it’s a monorepo.
There are a number of popular monorepo systems you can use, the 3 popular ones being Nx, Lerna and Turbo.
For this article we’ll use Nx to create an e-commerce monorepo containing an Angular and NestJs project. The NestJs project will serve as its backend.
1. Create the project using Nx
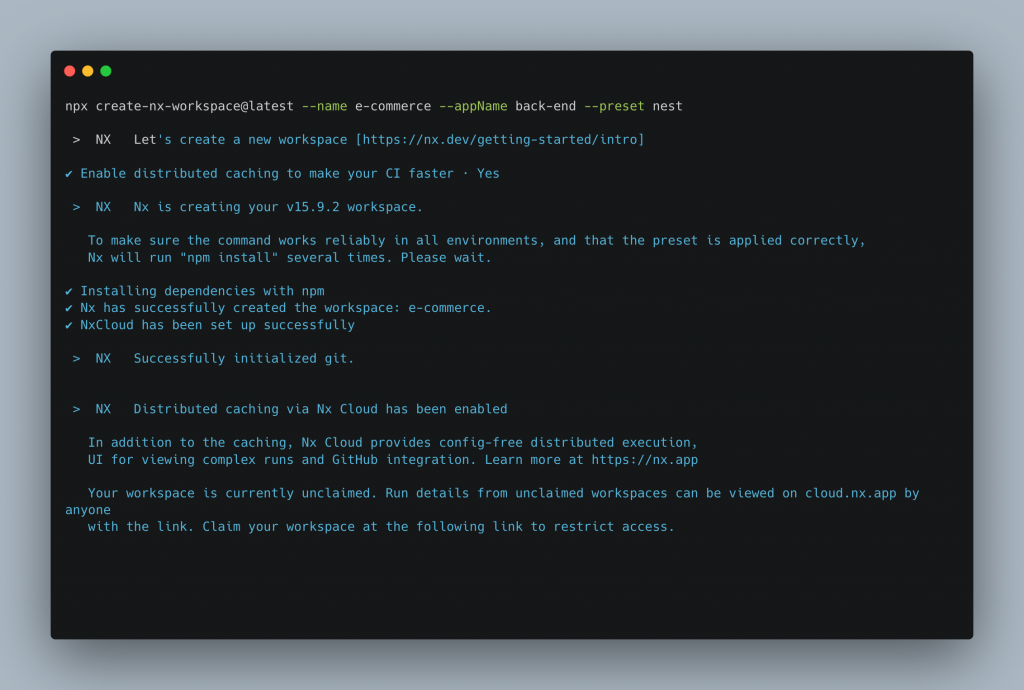
Navigate to where you want to create the new project and run the following
npx create-nx-workspace@latest --name e-commerce --appName back-end --preset nest
–name e-commerce will create a folder called e-commerce that will host both the angular and nestjs projects. It will also contain all the project configurations,.
–appName back-end will create a folder called back-end that will hold the NestJs project. Its similar to running `nest new backe-end`
It will as a series of questions e.g if you want to enable caching. Select Yes.
Navigate inside the project.
cd e-commerce
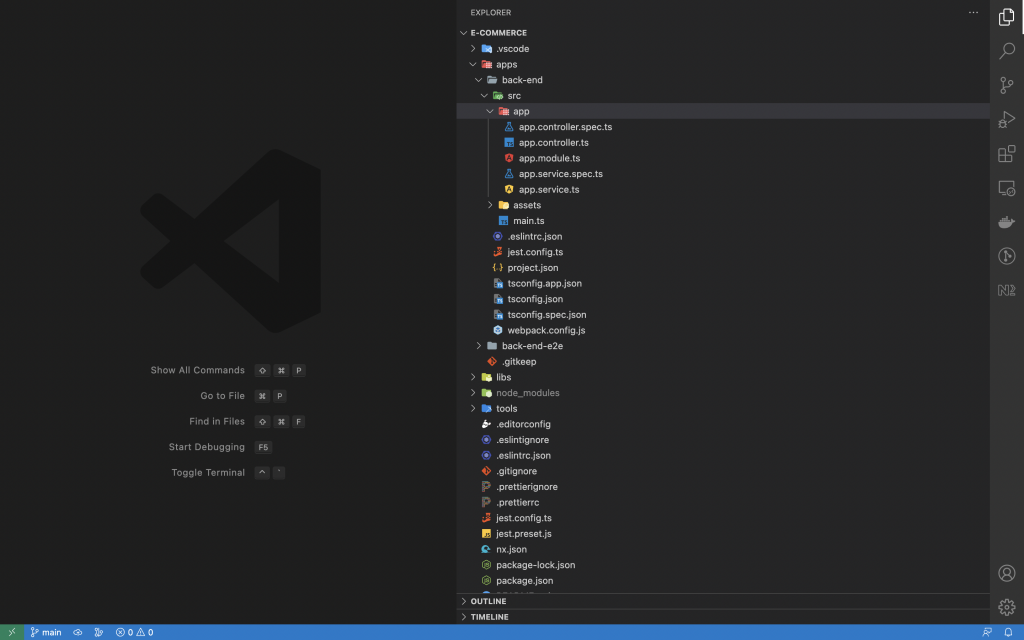
The folder structure
Next lets add the Angular project. We can do this by adding the `@nrwl/angular` plugin.
npm install @nrwl/angular
The Nx Plugin for Angular(@nrwl/angular) contains executors, generators, and utilities for managing Angular applications. Think of it as what we do with `@angular/cli`
Using the Angular plugin lets create the Angular project. We’ll call it front-end
nx generate @nrwl/angular:application --name front-end
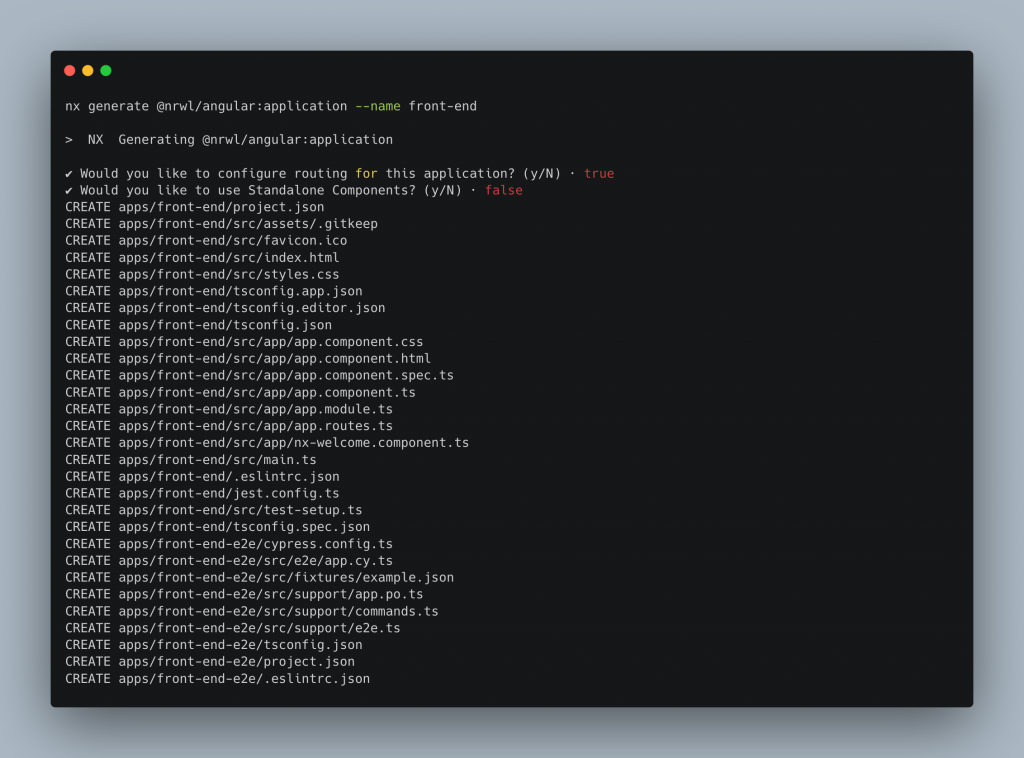
It will as a series of questions e.g if you want to set up routing, if you want it to be a standalone components etc.
A folder called front-end should now be in the project with the angular app

I noticed though that with Nx it did not create an app.routing.module.ts file. So one can either add routes to app.routes.ts or just create the routing module.
Lets test if the NestJs backend works
- NestJs App – back-end
To serve the application run
nx serve back-end

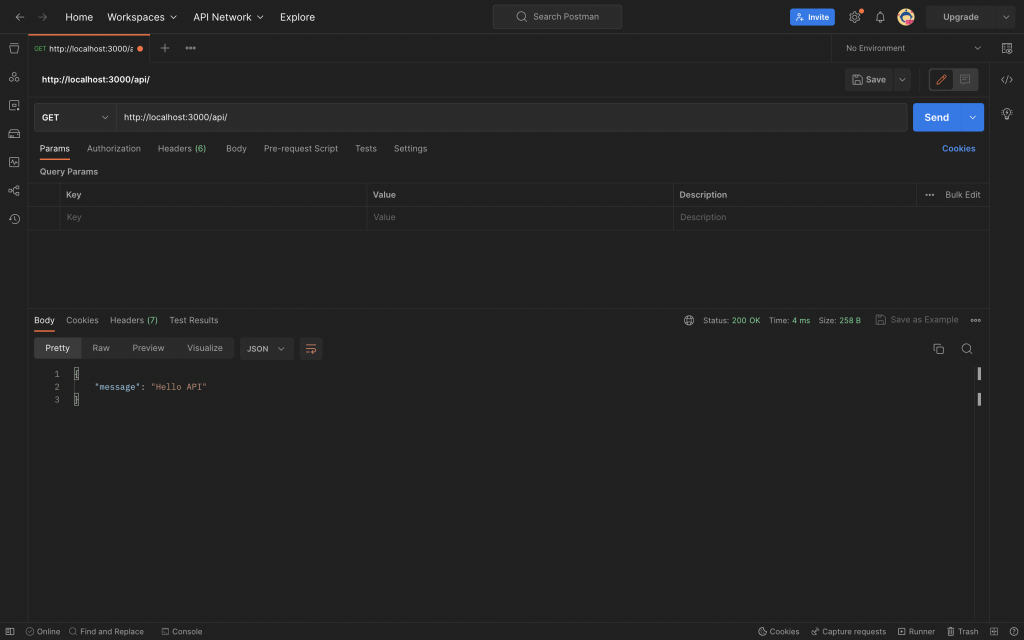
The application is being served via port 3000. Lets hit it via postman and see if its working
Remember to add /api if the app set a globalPrefix in main.ts file like the one shown below
import { Logger } from '@nestjs/common';
import { NestFactory } from '@nestjs/core';
import { AppModule } from './app.module';

async function bootstrap() {
  const app = await NestFactory.create(AppModule);
  const globalPrefix = 'api';
  app.setGlobalPrefix(globalPrefix);
  const port = process.env.PORT || 3000;
  await app.listen(port);
  Logger.log(
    `Application is running on: http://localhost:${port}/${globalPrefix}`,
  );
}
bootstrap();
Now lets serve the front-end i.e Angular
2. Front-end – Angular
Run
nx serve front-end

Access using port 4200 using the browser

If you can see that then congratulations!.
3. Test Front-end and Back-end Communication
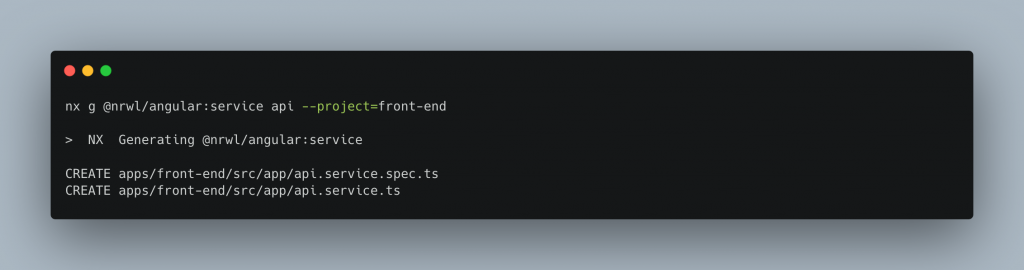
Lets test if our front-end can access data from our NestJs by creating a service that hits the backend. We’ll call it api-service
We’ll use the @nrwl/angular plugin we added
Run
nx g @nrwl/angular:service api --project=front-end
g is short for generate
:service means its an angular service we want to generate.
–project=front-end specifies the project we want to generate the service to
Lets confirm if the service was indeed added

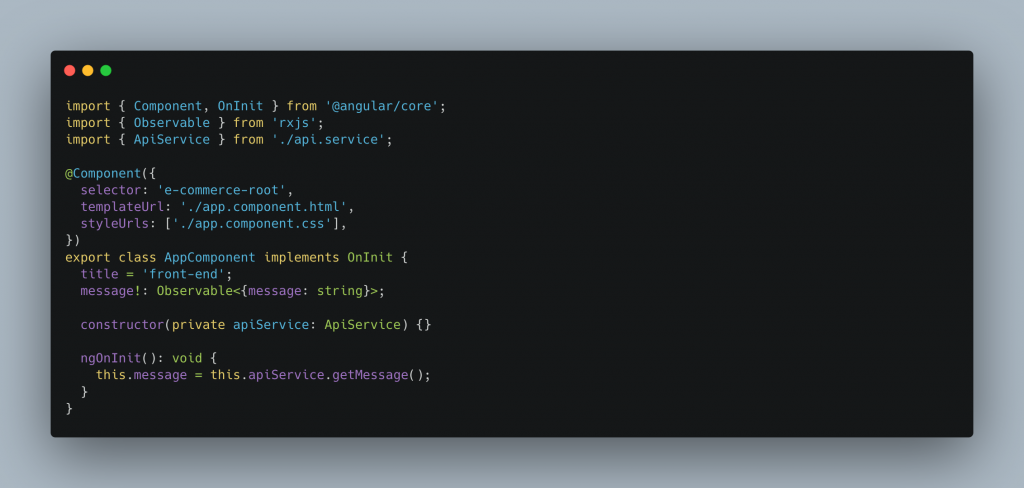
Next we’ll add HttpClientModule to app.module.ts and add HttpClient to our service so that we can make http requests and add a getMessage() method

Next we’ll consume it in our app.component.ts
And the template i.e app.component.html
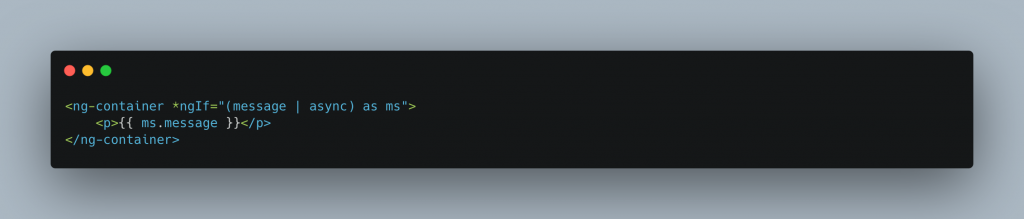
Lets reload the browser
You should be able to see the displayed text
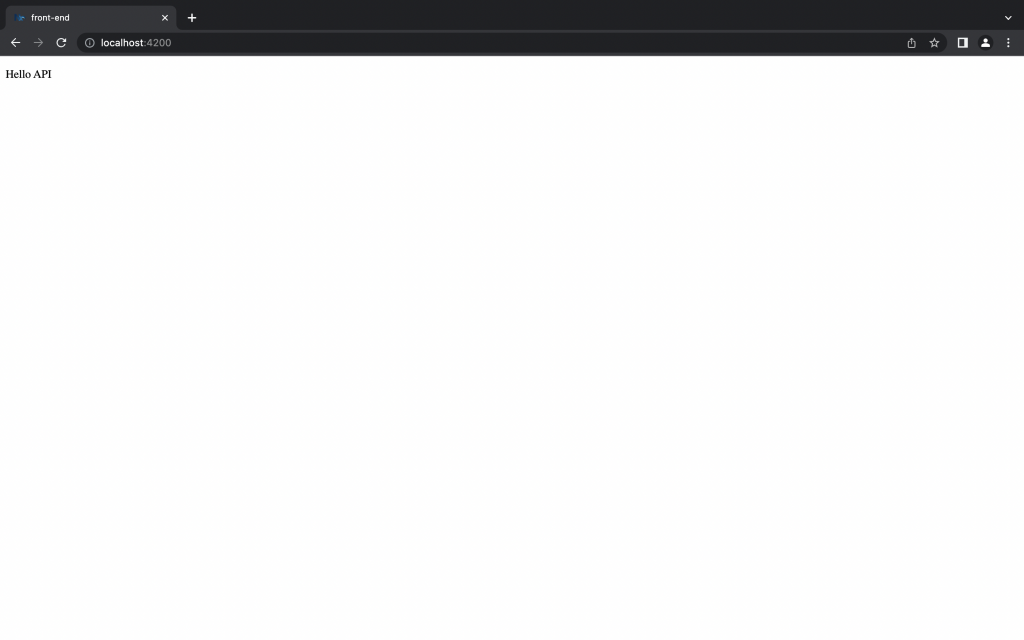
Nice. Everything works as expected.
The Nx commands are not difficult, they are actually very similar to the ones you would use in your Angular or Nest app, depending on the application.
With all our projects under one repo some of the benefits are
- Its easier to create libraries that can be shared across repositories,.
- You can look and understand other projects.
- Have a common pipeline for building,testing and deploying
- Avoid duplication of dependencies
- Easily add tooling.
- Quickly Scaffold projects and project files
- Caching makes subsequent build, tests super fast
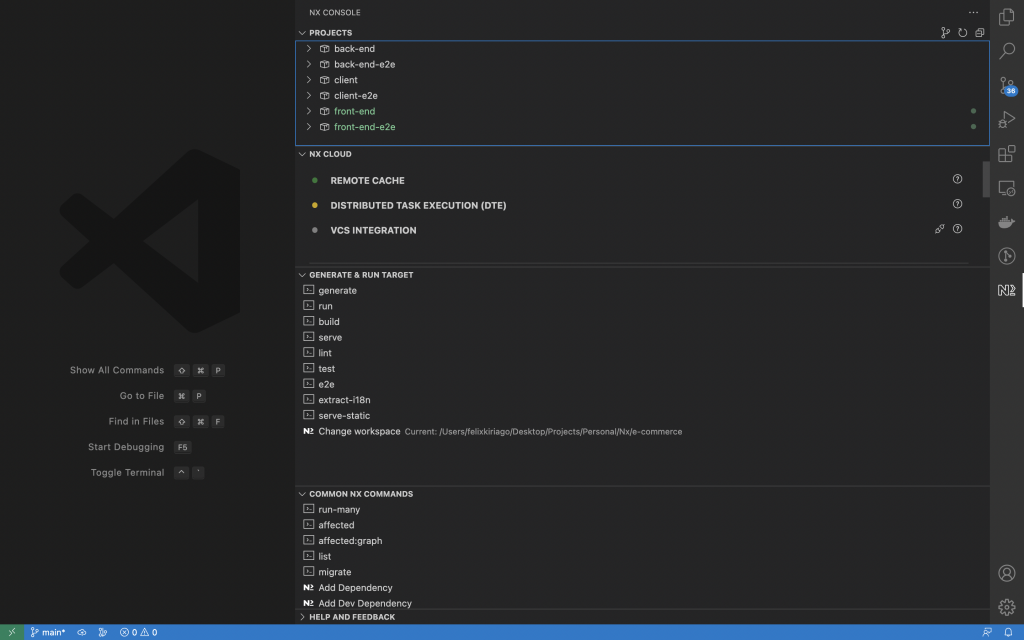
Nx also has a pretty cool VSCode Extenstion that can help you do all kinds of cool Nx stuff if you don’t want to use the terminal
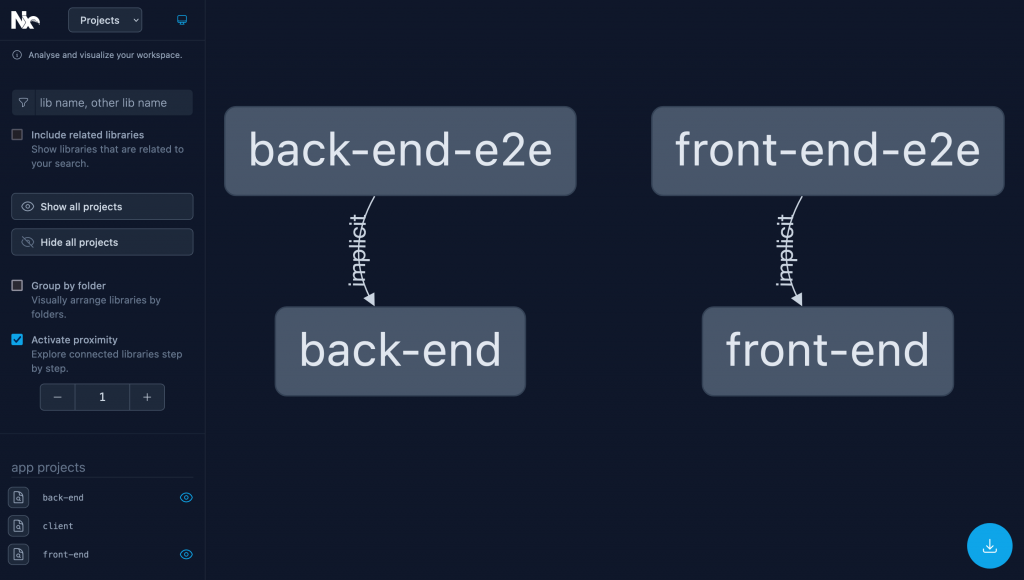
You can also generate graphs to see your project dependencies
nx graph